SmarDen for Developers is an online IoT platform designed for enthusiasts like you. It gives you complete freedom to design your projects from scratch, you take care of the devices and we’ll take care of the backend, cloud and dashboard.
We are working towards this platform which makes it very simple to build IoT projects. Whichever development board you’re using, if it can connect to WiFi we have got you covered. Through smarden.tech, you can not only control your devices but also monitor different sensor data all through a single dashboard.
As soon as you get your hardware ready i.e. all the sensors and devices hooked up to the microcontroller, you can move to smarden.tech and only with some minor steps you can get your project connected to the internet.
Here are some of the terms/steps you’ll stumble upon while visiting the website :-
- Registration: The first step is to create your user account, where you will be asked to enter your name, email id and phone number, and please enter the correct email id, so that you can get the password to login and can verify your account.

- Login: Here you can login into the dashboard with your correct Username and Password.

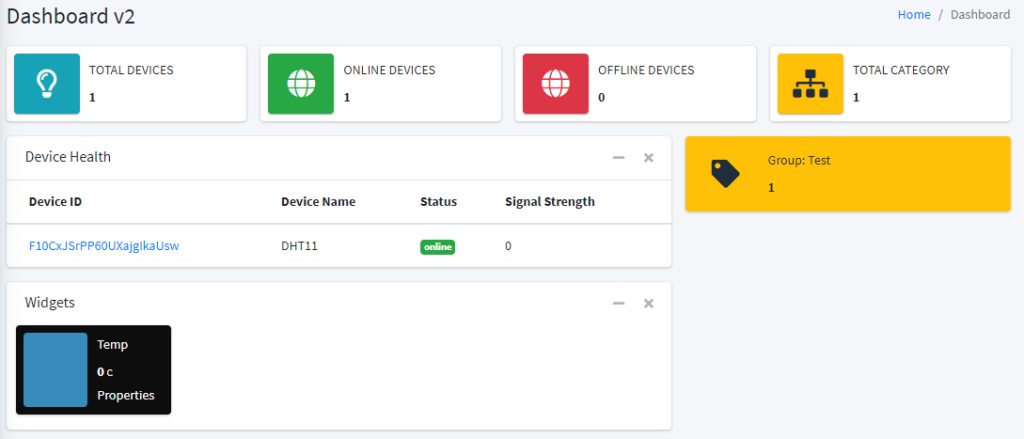
- Dashboard: On the Dashboard, you’ll get the complete overview about all the devices and elements that you’ve created. You can access those devices, control them and monitor them from your Dashboard. Moreover, you’ll also get to know about the device status and signal Strength. It is a complete overview of all the things that are related with your device.

- My Instance: Click on the My Instance and in this section you can create your own mqtt instance which you’ll be using to create the connection of your IoT device with the SmarDen.Tech dashboard.

- Components: There are different components that you can integrate with your SmarDen Dashboard. The Hierarchy goes that way – Groups -> Devices -> Elements.
- Groups: First you need to create a group so that you can add multiple devices in that group. The Group name can be anything like Sensors, Living Room, Switches, Bed Room etc.
- Devices: After creating the Group, you can now create your own device by clicking on the devices option. Here you can choose a device name like “LED” or “Fan”, then you need to select a group and then click on create. Once the device is Created you’ll be seeing the “Device ID” associated with that device. You’ll be needing that device ID while programming your IoT device.
- Elements: In the Elements section, you can create a UI element that will help you in monitoring or controlling your IoT Device. You can click on the Add button to add an element into the dashboard. It will ask you about the “Component Name”, here you need to enter the name of your element. Then you’ll have to select a device under which you want to create this element. Then you need to select the device type – either it be a sensor or a switch.
Further when you’ll choose a device type, you’ll get different options for different types of device.
- For Sensors there are widgets, notifications, and gauges.
- For Switches there are Toggle buttons, Push Buttons, Sliders, Colour Pickers.

You can select any of these devices and it will be reflected on the dashboard. Once the element is created, you’ll see the list of elements along with their specific “Element ID” and “Device ID”.
You’ll be needing these element IDs and Device IDs while programming your IoT Hardware.
Start using SmarDen.Tech for your projects. Tag us in the projects you make and we’ll feature you on our pages.


Recent Comments